Friday, April 29, 2011

THE UGLY TRUTH


Sharing these photos is kind of like going to the wall in your underpants. I'm embarrassed, for whatever reason, to peel back the layers and reveal the ugly truth. But, it's part of moving forward I guess. This is the part of the story where I get a bit overwhelmed in the rebuild process (I know I'm jumping all around here in the chronological order of photos on this blog, but I was getting ahead of myself). I knew I would be shocked by what I found when I peeled back the exterior wall, but this floored me! However, to keep from totally spinning out of control I simply removed ONE section at a time. I took detailed photos so I could put it back together when the time was right, and kept all crucial pieces (rot or otherwise) so I could make the EXACT piece again (note in photo where I recreated a side support). So, just when you start to question why you've taken on this project, look at the tiny pieces as one huge victory at a time. When I replace a piece of rotted wood with a clean, new piece (big or small) I know I'm one step closer to getting on the road!
WHAT I DID: Focused on the worst sections first, starting on the bottom and working my way up. Instead of ripping apart, I slowly peeled the old away so not to destroy any pieces I may need to copy or reuse.
HOW MUCH THIS COST ME: Not a penny. Again, I'm reusing wood from home projects to keep costs down.
HOW STRESSED I WAS: Stress was high, but I had to step back and realize it's just one step at a time.

Thursday, April 28, 2011

GOOD ON PAPER


The title of this blog, "Aqua with Envy" is not meant to communicate that what you will see transform in my trailer is something to be envious of. Rather, the hundreds of photos I've seen of other people's renovation and restoration projects on both Scotty Enthusiasts websites have made me envious of the vision, drive and pure passion people have had for these great little trailers. Quite honestly, it's also scared the heck out of me. Just like renovating an old house (or new, for that matter), you never know the scope of the project until you open up the walls. And the walls in Louis were a MESS! Where water damage was obvious (some of the plywood walls has rotted to the point of turning into a substance that looked like sand) I removed the rot and replaced the wood with new pieces, new insulation and, at times, an aluminum barrier with Tyvek to protect the wood. Even if I didn't need to replace some of the interior walls the damage was a bit unsightly, something a little primer and paint would NOT hide. So, I did a little research again for "vintage" and "retro" wallpaper covers. I knew that traditional paper would most likely not work because of the drastic changes of weather in the northeast. Our incredibly humid summers would probably peel paper in no time. I put my Interior Designer hat on and found a great company, Tempaper, who designs wallpapers specifically for people with changing tastes and tight budgets. If you're staging a home for the real estate market, these hip wallpapers might be just the trick for, say, a half bath to hip it up and sell that house! Easy to install and even easier to remove, the papers are made of thick, durable plastic with interesting, retro yet modern designs. If you like the look and want to keep it, no problem. The paper will stay in place as long as you like. To hide a few of the blemishes on my walls and hip it up a bit, I bought a roll of Tempaper on Amazon.com for $56. Urban Outfitters also sold the same paper for $76/roll and the www.tempaper.com website sells for $76/roll as well. One roll covers 56 square feet, so lemmie get rolling and see how this one turns out!
WHAT I DID: Researched vintage papers and found this great, durable brand.
WHAT THIS PROJECT COST: $56 for a roll of paper which was delivered via Amazon in two days
HOW DIFFICULT THIS PROJECT WAS: So far, so good. Just unroll the paper, stick it and you've got a great look in no time. I'll post photos tomorrow if it turns out the way i want it!

Wednesday, April 27, 2011

JUDGING FROM THE OUTSIDE


So, my little Louis was in pretty bad shape when I picked him up in Pennsylvania earlier this month. In retrospect, I probably took on a much bigger project than I initially anticipated. He leaks more than an employee at Wikileaks, wood is rotten in most spots, smells like mold and, well, needs a heck of a lot of TLC. But, I'm prepared to do that and look forward to the (continuing) challenges of owning an older trailer. One of the first things I wanted to do was repaint the outside of the trailer, maintaining some of the Scotty's integrity with that signature Aqua (which I found at walmart in a Rustoleum brand), yet putting my own signature on the look. I love the silver and aqua together and, after a few major rainstorms, can see how valuable the Rustoleum paint is as the water literally rolls off! A few extra additions I made to the outside was purchasing reflector lights at walmart for $1.65/each, two in red and two in orange. I placed the round reds on either side of the front and the orange on the sides in the rear. While not totally necessary if all other lights work, the more approaching vehicles can see in the dark of night, the better in my opinion. A few other items I added to the outside were found on ebay: the rear Serro Scotty decal I purchased for $15 and original red and black plastic logo for outside the door. While I hate to label, sometimes it's necessary!!
WHAT I DID: went to the camping section at walmart and purchased four reflector lights for under $2/each ($1.65 to be exact). On ebay, searched "Serro Scotty" and found a decal for the back of the trailer and an original logo for the side.
HOW LONG THE PROJECT TOOK: Less than ten minutes
WAS IT DIFFICULT? Not at all and, actually, love the way they look!

Tuesday, April 26, 2011

A SILVER LINING


I had a minor setback this weekend, after two weeks of painstaking renovations on Louis, we had several storms pass through the area. While I covered Louis with tarps, he still leaked....all over the new beadboard in the dinette area. To say I was a bit depressed, especially after peeling back the skin, replacing the new wood, covering it in Tyvek AND Aluminum, is an understatement. But, I guess that's the same thing that happens with home ownership. Right when you think you're finished with a project or happy with what you've got, something takes a giant crapola on it! So, instead of ripping the skin off yet again, I secured the area a bit tighter with more tarp and plastic, deciding to put that project off for a later, dryer day. Instead I focused on the ceiling, which turned out to be another minor setback. In my minds eye (which tends to focus much easier than my REAL eyes), I pictured a stainless ceiling, bringing a more modern twist to my old Scotty. Well, if you've priced stainless you know it's a fortune, so I turned to the less expensive, easier to work with (or so I was told) alternative of ALUMINUM. This was also the most expensive part of my renovation. At $45 for a 4'x8' sheet, it will take three to cover the ceiling and area behind the stove, leaving me a few extra pieces for exterior work (I placed it as a barrier between the exterior shell and wood on the front, where my tow vehicle water might splash more than normal amounts of water, ignoring the side panel which leaked). Well, Aluminum is NOT as easy to work with as I had hoped. It's hard to cut (I purchased aluminum sheers which you should DEFINITELY wear gloves while working with the sharp edges) and a challenge to drill through. Once I got it up, however, I was pleased with the results. A little aluminum shiner, and my finger prints will be gone!
WHAT I DID: Went to a local lumber yard and purchased three 4x6 sheets of aluminum and aluminum cutters at Home Depot
HOW MUCH THIS PROJECT COST: About $150
HOW DIFFICULT: Removing the skin and old wood was FAR easier than this project. But, a deep breath goes a long way!

Saturday, April 23, 2011

WHAT'S IN A NAME?


My Grandpa Louis taught me the fine art of loving the outdoors. Summers spent with Grandma and Grandpa in Leroy, Michigan created memories I won't ever forget. Fourth of July weekends found everyone they knew camped out on the 80 acres of green, peaceful bliss. I, an adventurous kid, would run from trailer to trailer asking for tours of these grand weekend homes on wheels. One year Grandpa Louis was so brave he offered to watch me and my two brothers (I was four, Dwight was six and John ten) when my Grandmother, Mom and Dad flew to Europe. Louis hooked up the 1975 Argosy to his Buick LeSabre and off we went from Grand Rapids to Leroy, with me in the back seat staring at the trailer the entire time, making sure it didn't fall off. Two days of pouring rain, three kids fighting over who got to sleep on the sofa and poor Louis had had enough. We hooked her back up, closed down camp and headed back to Grand Rapids. I've never forgotten that trip with Grandpa. One year Louis surprised Grandma Helen by purchasing a 1971 Titan, and oh was she ever surprised! After the initial shock wore off, Grandma saw Louis vision; to drive across country visiting relatives along the way, escaping the cold, harsh winters of Michigan. When they arrived in Silver City, New Mexico for Christmas (where we were living at the time) I begged Grandma and Grandpa to sleep in the RV with them. I loved every minute of it! Louis was a quiet, fairly introspective man who loved his family and adored spending time with his grandchildren. He passed away just before Christmas this year, and now that I live so close to Michigan, it saddens me that I can't pull up in my Scotty and surprise him with a weekend of camping only he could appreciate. But, I'm sure he's somewhere looking down with a grin of pride and admiration, just as I do when I sit in my Scotty thinking about what he has done to open my eyes to this adventurous world. So, I will name my Scotty, "Louis" after the man who taught me to step outside of my box and enjoy the outdoors!
(Photo taken approx July, 1978 at Grandma and Grandpa's cabin near Leroy, Michigan.)

THEN I WAS FLOORED


When I bought the Scotty he had been renovated (like some homes) by people with very different taste than mine. No judgements, of course, but it looked like a Pizza Hut, complete with red stained carpet and red accents everywhere. When I removed the red carpet it revealed the cool, very 70's yellow and brown linoleum original to the Scotty. Sadly, where the previous owner skimped on carpeting the whole floor, they painted bright red. So, I headed to Lowe's to find another alternative, planning to get stick tiles of some sort. What I found surprised me. Now, I wouldn't put these in your home unless in a basement, laundry, etc. but these stick wood strips came in 4"x24" pieces for $1/each. Colors varied from dark to light, so I went right in the middle with an oak finish. Sure, it's not staying true to the integrity of the original design, but I thought it looked nice and will go well with my stainless/retro green/fabric walled ensemble I have going on here. Hopefully it won't look like a hooker den when I'm finished!!
WHAT I DID: Bought one box of laminate sticky wood strips at Lowe's for $32.50, and went to town sticking them on the floor for a great finish.
HOW LONG IT TOOK ME: Less than an hour!

Friday, April 22, 2011

A BLANK CANVAS


Because I'm trying to do this renovation as inexpensively as possible (before I resort to holding a sign on the street corner that reads, "will design for wine") I'm trying to use a lot of the ideas I've executed in home staging projects. After walking the aisles of Home Depot searching for inspiration, I came upon canvas drop cloths (12'x12') in white and tan and, I thought, that would be great fabric. While most likely next to impossible to sew, it's easy to staple gun it! In a master bedroom I created a headboard by using plywood, foam and the $5 drop cloth I bought at Home Depot to design a clean, modern almost linen-look. So, why the heck not do the same thing in Scotty? Because I'm going to use the back bed as a daybed, I wanted it to be more warm than the front dining area. Because the trailer is so small, by the way, my plan is to create "areas" to give the illusion of a larger space. So, I've attached bead board to the front dinette wall which will be painted a very similar to Scotty-aqua. The rear area I wanted to be more warm and comfy for reading, chatting, watching SOMEONE cook (I don't), so I thought fabric would be really cool. The ceiling will all be aluminum so I didn't want that to come down next to where I'm sleeping, so I attached the canvas to the top of the windows and staple-gunned away, carefully cutting around the openings with an exacto knife. The fabric can then be rolled up or down (like campers of the 40's).
WHAT I DID: Took that Home Depot Canvas and went to town. Because it's so easy to work with and inexpensive, it's okay if I screw it up!
COST OF THIS: Again, I used left overs so NOTHING, but 12'x12' run about $5-$8 at Home Depot and would make great seat cushions too!
HOW LONG IT TOOK: About twenty minutes

Monday, April 18, 2011

TURNING GREY


A little girl looked at me yesterday in the Post Office, smiled and said, "Mister, a bird pooped on you." Well, it didn't actually (but isn't that good luck if it had?). My birth mark is a tiny grey spot of hair over my right ear and I have never, ever not heard someone say something about it. Why not dye it? Because it's part of who I am. Also part of who I am is to ramble on and on, so I've decided after the last entry that I would make these entry's more like my design blog. Short and to the point. While I LOVE this new Scotty and it's great retro colors, I also want to make it my own, so have chosen to paint it Grey in certain areas. Just like Hansel, I haven't found the color that's juuuuuust right (it was Hansel with the Bears, right?). I found what I believe is close to the Scotty Aqua at walmart, called "beach blue" so I grabbed a few cans to test it out. I'm also repainting the white and will do that and the grey in Rustoleum to protect the finish. Humm...I'm sure I'll do this several times, but think it needs more Aqua.
WHAT I DID: Used a brillo pad to sand down what previous owners had painted with a brush. It is what it is, for now, so I'm just going with it. Bought two cans of Beach Blue Rustoleum Spray paint from walmart and two cans of grey and white Rustoleum exterior paint. These are OIL based, so I bought inexpensive brushes so not to destroy my more expensive interior brushes.
COST OF THIS PROJECT: Under $20
HOW LONG IT TOOK: I was surpirsed, less than two hours!

Thursday, April 14, 2011

CAUSE YOU GOTTA HAVE FRIENDS........


My name is Paul Hecht and I'm an odd ball. (Audience says "HI PAUL"). I have loved travel trailers and motorhomes since as early as I can remember, and that love has been a lonely one for me. My parents hate them. My siblings mock me for loving them and ask, "why not buy a boat?" When I answer, "that's like saying why snow ski when you can surf?" I still have my green tonka van with pop up trailer I got from Santa at age 4, yep still have that Barbie Camper (I ONLY wanted because it was a camper!!) he brought me at age 7. When approaching a design job of any kind, personal or other, I always ask, "what do you want it to say?" I despise most of the designs I see in magazines because I think to myself, "would I be comfortable taking my shoes off there? What if I spilled something?" Just like my Christmas tree tells a story of where I've been (ornaments that were given to me by anyone, any time are always on my tree), my home does the same. I don't believe in the living room no one enters. I want it to tell the story of who lives in it. If you walk into my home you should say, "that's totally Paul." I have resisted buying a trailer for many years for the fear of being mocked by my friends. Camp? Are you KIDDING? They shop, brunch and go to the beach. Camp? NO WAY. Joe, my other half, camp? Heck-to-the-NO! After a pretty rough year of nonsense, I decided to treat myself to something nice. So, I bought Scotty. Some of the most fond memories I have from childhood were my summers spent in Michigan with my Grandparents. While they lived most of the time in Grand Rapids, they owned 80 acres near Luther, Michigan in the middle of nowhere. The fourth of July was always HUGE at my Grandparents cabin where friends, relatives and anyone who needed somewhere to go would join, with trailers in tow, for a grand old time. I played with my cousins, cooked with my Grandmother, and learned how to fix trailers with my Grandpa Louie. THAT is where I learned the true value of family and I will never, ever forget it. So, at 37 I set out on an adventure to grab a little of that past before it becomes too dim of a light to reignite. After finding a desperate rescue trailer on Craigs List "vintage trailer in need of TLC, no pic" I secretly headed to rural Pennsylvania (telling Joe I was visiting a client because I knew he would talk me out of it). On the 200 mile drive I thought about my Grandfather and how, after his passing in December, he would LOVE to hear all about this trailer. One day, in the 1980's, he surprised my Grandmother by purchasing an old Titan motorhome to drive across country. I think she was so surprised, he slept in the Titan that night! As the new proud owner of a Scotty in need of TLC, I returned home where I was met by the rolling eyes of my partner. So, that night I went online and searched for others like me. In a few clicks of my mouse, I met a whole new group of friends like me. Because of them (the Serro Scotty Camper Enthusiasts) I calmed down after hearing words of encouragement about restoring this trailer. When Joe said, "good God what have you gotten yourself into with this mess," they said, "good luck, go for it, bring it to a rally no matter what she looks like!" Words of encouragement, friendship, from people I've never met. Oh the wonders of the internet and, more importantly a hobby and passion that unites!
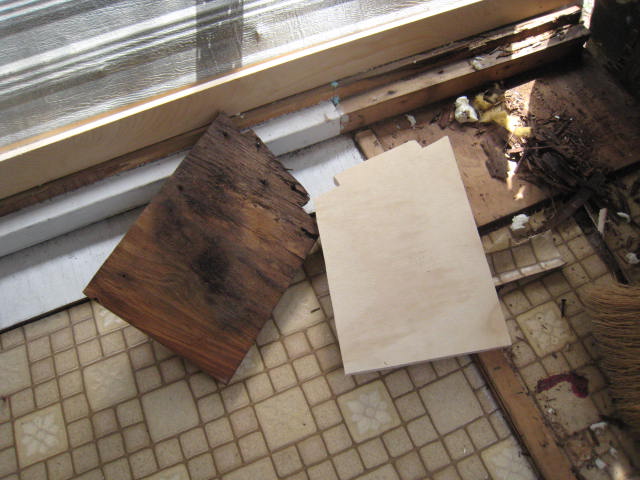
WHAT I DID: Bless my heart, because I thought I could clean up the kitchenette area with Windex. Well, I couldn't. So, I slowly took it apart (the cabinets were rotted beyond repair, falling off the wall) and, thanks to the advice of members, KEPT the pieces to use as a template if I so choose). Overwhelmed, I walked away from it after removing everything, came up with a plan and added a little support so my ceiling wouldn't cave in.) Using wood from our garage, I started adding extra supports to the back wall as I plan on hanging open shelving to make it feel more airy.
COST OF THIS PROJECT: nada: used old wood from past projects.
HOW LONG IT TOOK ME: two hours

Tuesday, April 12, 2011

THE MORNING AFTER


Well, after rolling Scotty into our rainy mess of a driveway, I decided to get a jump start on resourcing how to renovate him on a TIGHT budget. When I say tight, I mean I have NO money to spend on this as we face a big move, etc. so I've allowed myself a budget of $500. I also thought that might present an interesting challenge, much like a design project where a client's budget is much lower than their expectations. So, here I go. With a quick google search of "Serro Scotty" I landed on the Serro Scotty Camper Enthusiasts website where I quickly met a great new group of friends. I've seen their restoration photos, heard the stories of how they found and rebuilt them, discovered a wealth of information about sourcing vintage parts, etc. While the classic Serro Scotty colors are aqua, white and yellow, I've decided to pay homage to the group that got me so excited about camping; the Airstreams. So, I want to paint mine a classic silver, white roof and accent it with the vintage Serro Scotty Aqua. First things first, I have to do a reality walk through and see what's going on. Oh dear...the morning after aint pretty, but I'm up for the task!
WHAT I DID: Decided, much like avoiding credit card bills, just to open it up and look at all the dirty parts to access how much work will have to be done. Then, I picked my starting point; the design of my scotty has an overhead cabinet/bunk in the rear over the sofa bed, which I would like to turn into a comfy daybed for adults by day, and bed for me by night. So, to give more headroom, I will need to remove the bunk cabinet from above. Also, I'd like to use a fairly new twin mattress I have on an unused daybed in our home, so I will be adding a bit of weight to the Scotty. By removing the overhead bunk cabinet and wood, I make (weight) room for the mattress as well.
COST OF THIS PROJECT: $0
TIME IT TOOK: Less than an hour. I was very careful in ripping it out, however, not to rip the walls, etc.

Monday, April 11, 2011

SPRING FLING


It's been a long, cold winter here in the Northeast and what do we like to do when it's so dark and cold we can't go outside? Well, Joe orders car brochures from every company from Porsche and Audi to Fiat and Ford. I order travel trailer brochures, check the internet for great deals and fantasize about warm days when I can hitch up, head out and have fun. So, this year on a cold, wet, snowy April morning I headed out to rural Pennsylvania (Lancaster, PA to be exact) where I had seen an ad on Craigs List offering a "vintage trailer in need of TLC." After a few email exchanges the owner told me it was a 1979 Serro Scotty HiLander. I did a little research and discovered these little gems with their aqua stripes and simple interiors, have just as big of a following as the popular Airstreams. Because the deal was a steal, I thought, "why not?" After driving through snow, rain, sleet and wind with no working electric ANYTHING, I pulled him into our driveway and waited until dawn to check him out. So, here's what I saw. I've ripped apart houses and put them back together, I thought, so why not try this great little trailer??